Yes it is holiday cookie time…
Probably one of my favorite things about the holidays are all the goodies I get to bake. And I have been dying to use my $1 target cookie cutters…so here are my
“Royal Icing Halloween Cartoon Cookies!”

First is the cookie: (thanks to the good ole Joy of Cooking)
Combine and whisk together:
3 1/4 Cups Flour
1 1/2 teaspoon baking powder
1/2 teaspoon salt
Beat until fluffy
20 tablespoons unsalted butter softened (2 1/2 sticks)
1 cup sugar (I added a little extra)
then add:
1 large egg
1 tablespoon milk
2 1/2 teaspoons vanilla
Gradually add flour mixture.
Divide the dough into two and place each ball of dough in between two sheets of parchment paper. Roll out the dough so that it is 1/4 inch thick. I like them really thick then the cookies are softer after baking. Then refrigerate until cold and firm about 30 min.
Bring out dough, peal away parchment paper to loosen and then start cutting. Repeat the rolling of the dough and place back into fridge while working with the other dough and keep alternating until finished.
Bake for about 6-9 min at 375 degrees
Now for the Icing!!
My favorite part. Well I must say that Royal Icing is the way to go, it hardens and is so easy to move around and shape I love it.
All you need is:
1 Pound Powdered Sugar
1/4 cup Meringue powder: I like this better than egg whites
(can find at Michaels or other baking supply stores)
1 cup Water
Now the consistency of the icing is VERY important. So you might need to keep adding powdered sugar to get it just right. You want it thick, so that you see peaks forming while you are mixing it with your mixer. This makes it the easiest to spread.
Now food coloring options… I just go to Michael’s (or other baking supply stores) and get exact color food coloring, I don’t really enjoy all the mixing of the primary colors ha ha. And they have so many choices :)
Once the icing is separated and the colors mixed in. Its time to put it onto the cookie! I just put a dollop in the middle of the cookie and spread out with a knife. The icing is fabulous and sticks great and when laid out flat the icing will even out as well.
I used a pastry bag for the eyes.
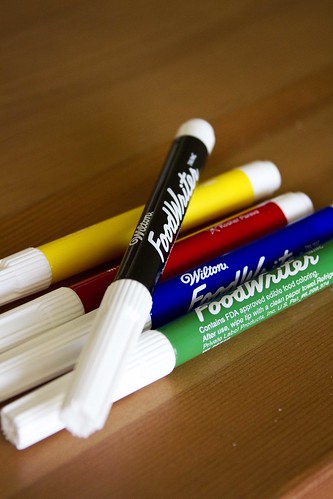
Lastly after you let them set for about a day….its time to draw.

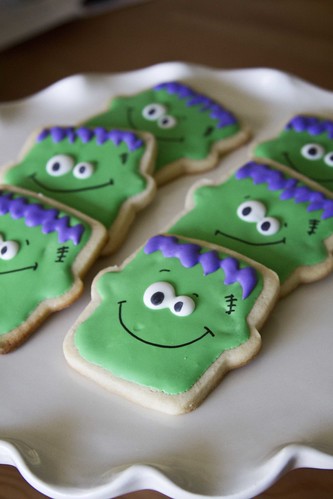
With these amazing edible pens.
Its fun to give them different expressions.
With these amazing edible pens.
Its fun to give them different expressions.
and your finished project is just way to cute for words!
Sorry I get way to into baking that I somehow forget to take pictures until Im finished. Hopefully my directions didn’t seem too crazy!