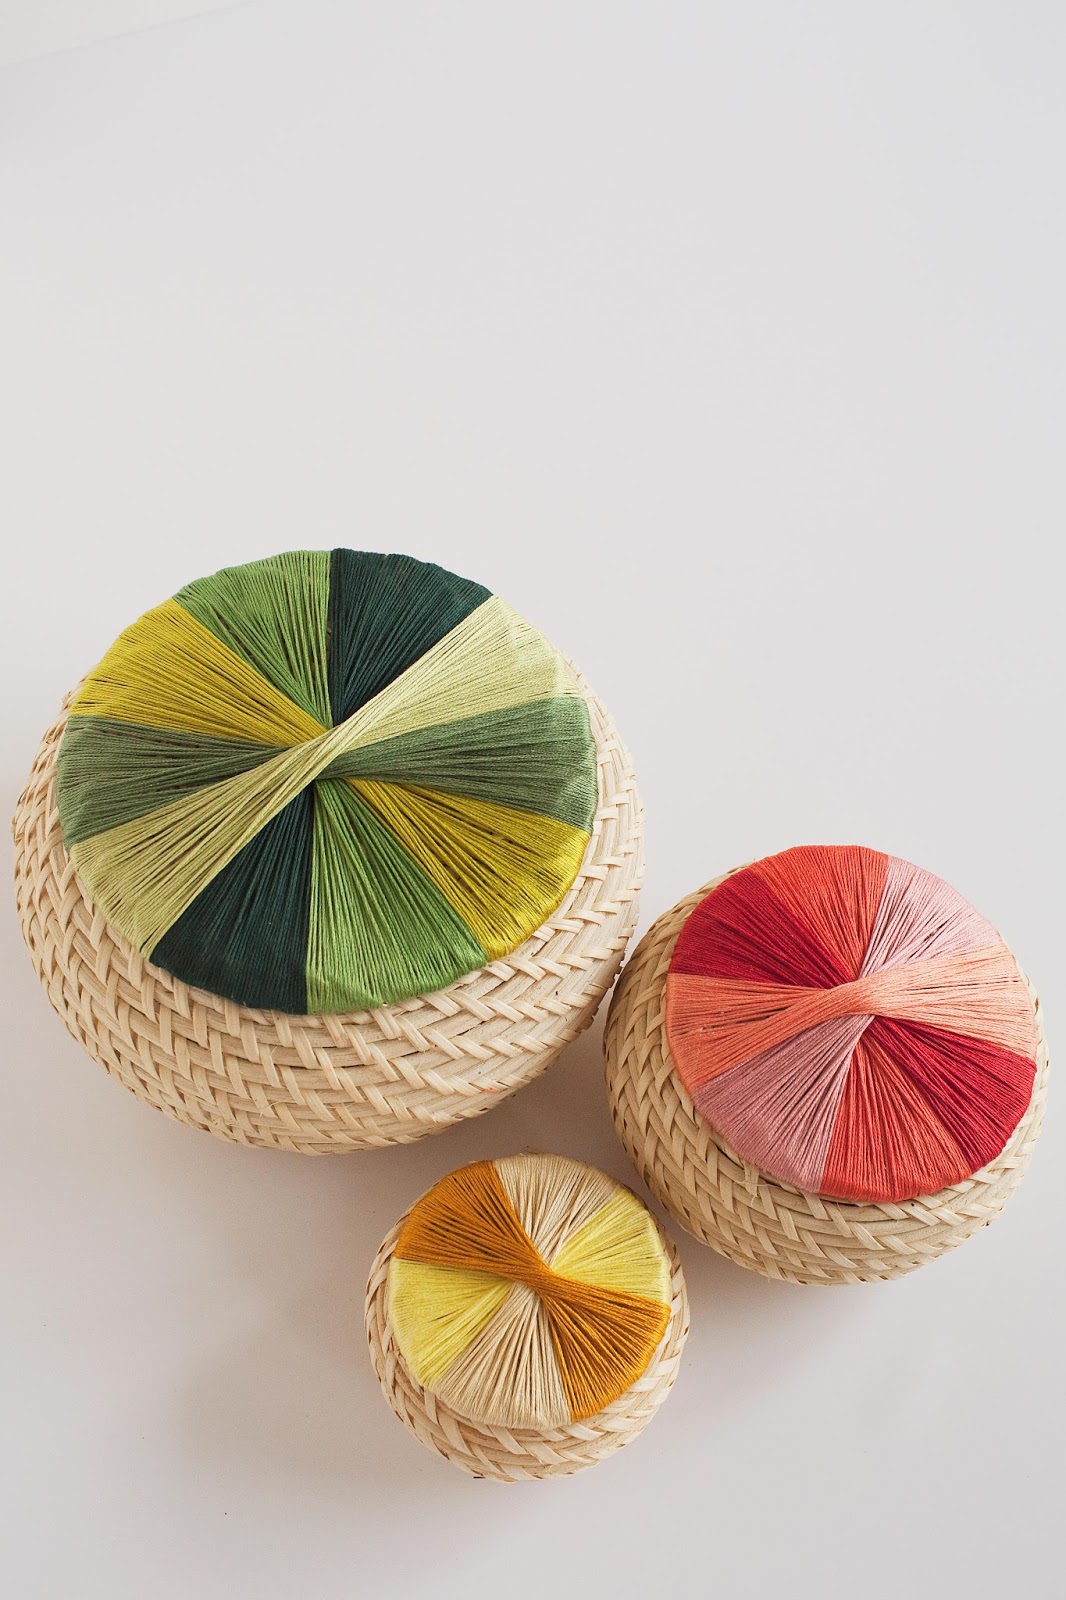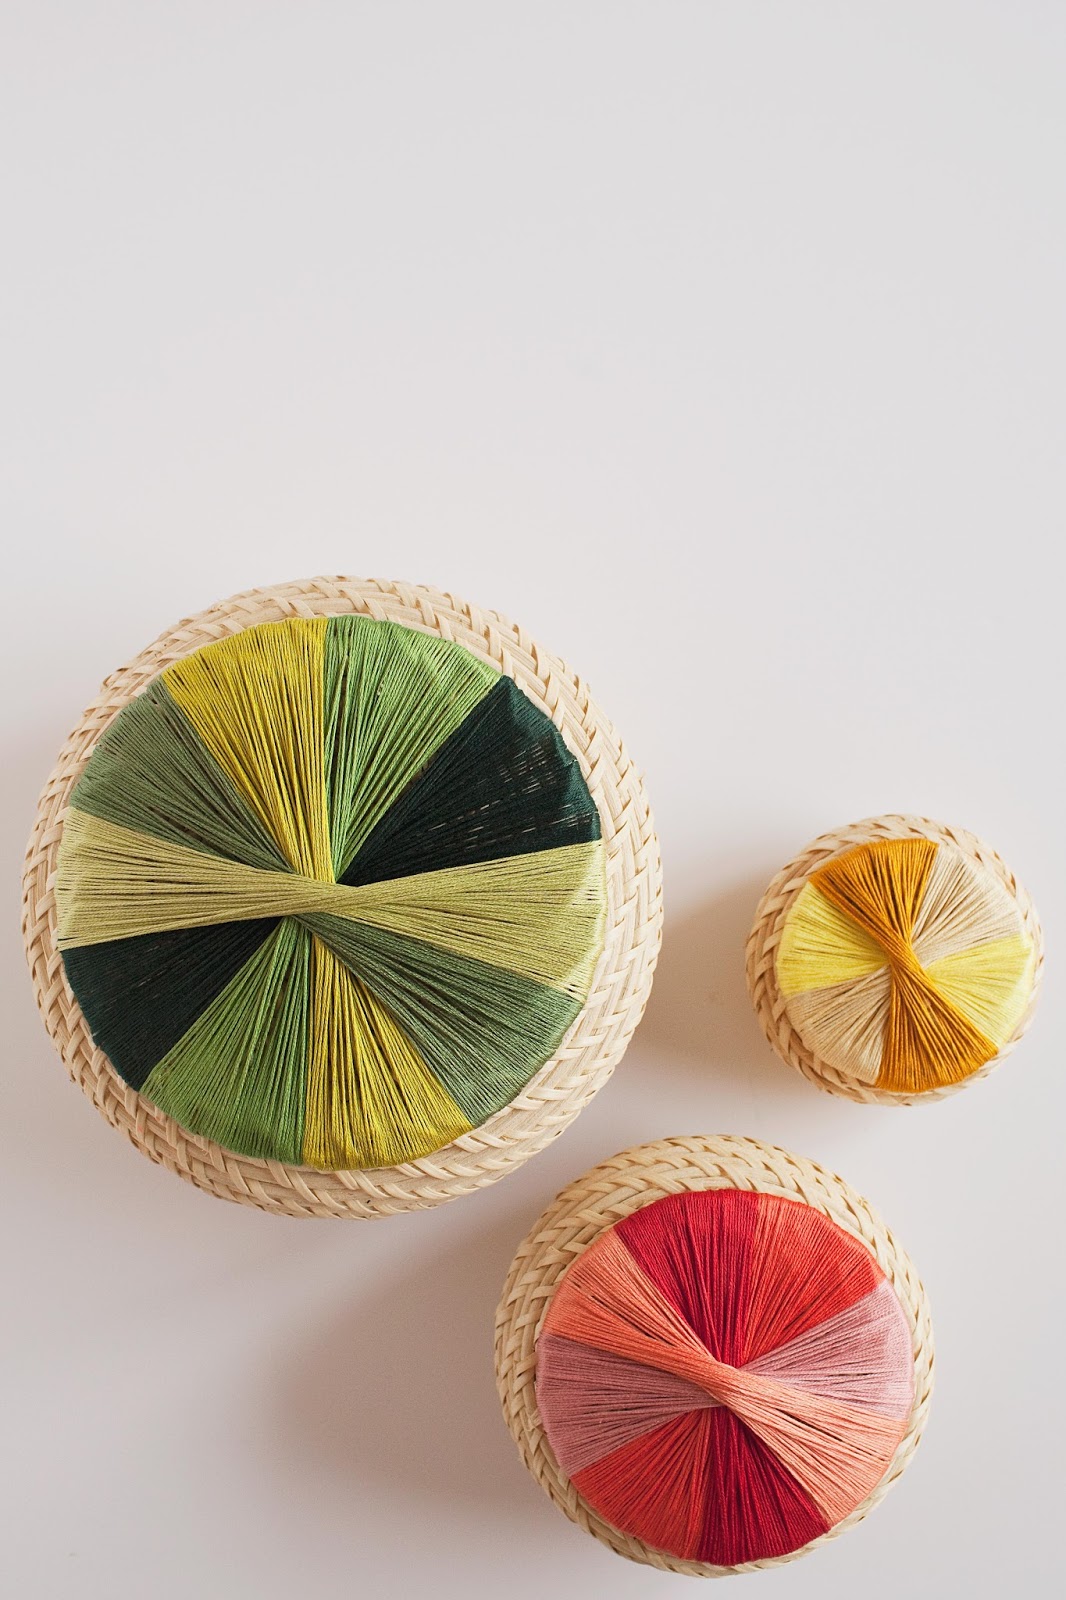
I saw these baskets at IKEA and knew I had to have them, but that I needed to spice them up a little. (I am really into IKEA hacking lately, ha ha, if you can’t tell).
Oh what good a little embroidery thread can do! I loved how these baskets turned out and they are perfect for just about anything. Storage, home decor, or maybe even a cute way to give a gift, and, you can personalize it using any color. Another perk? They don’t take long to make. Read all about it after the jump.

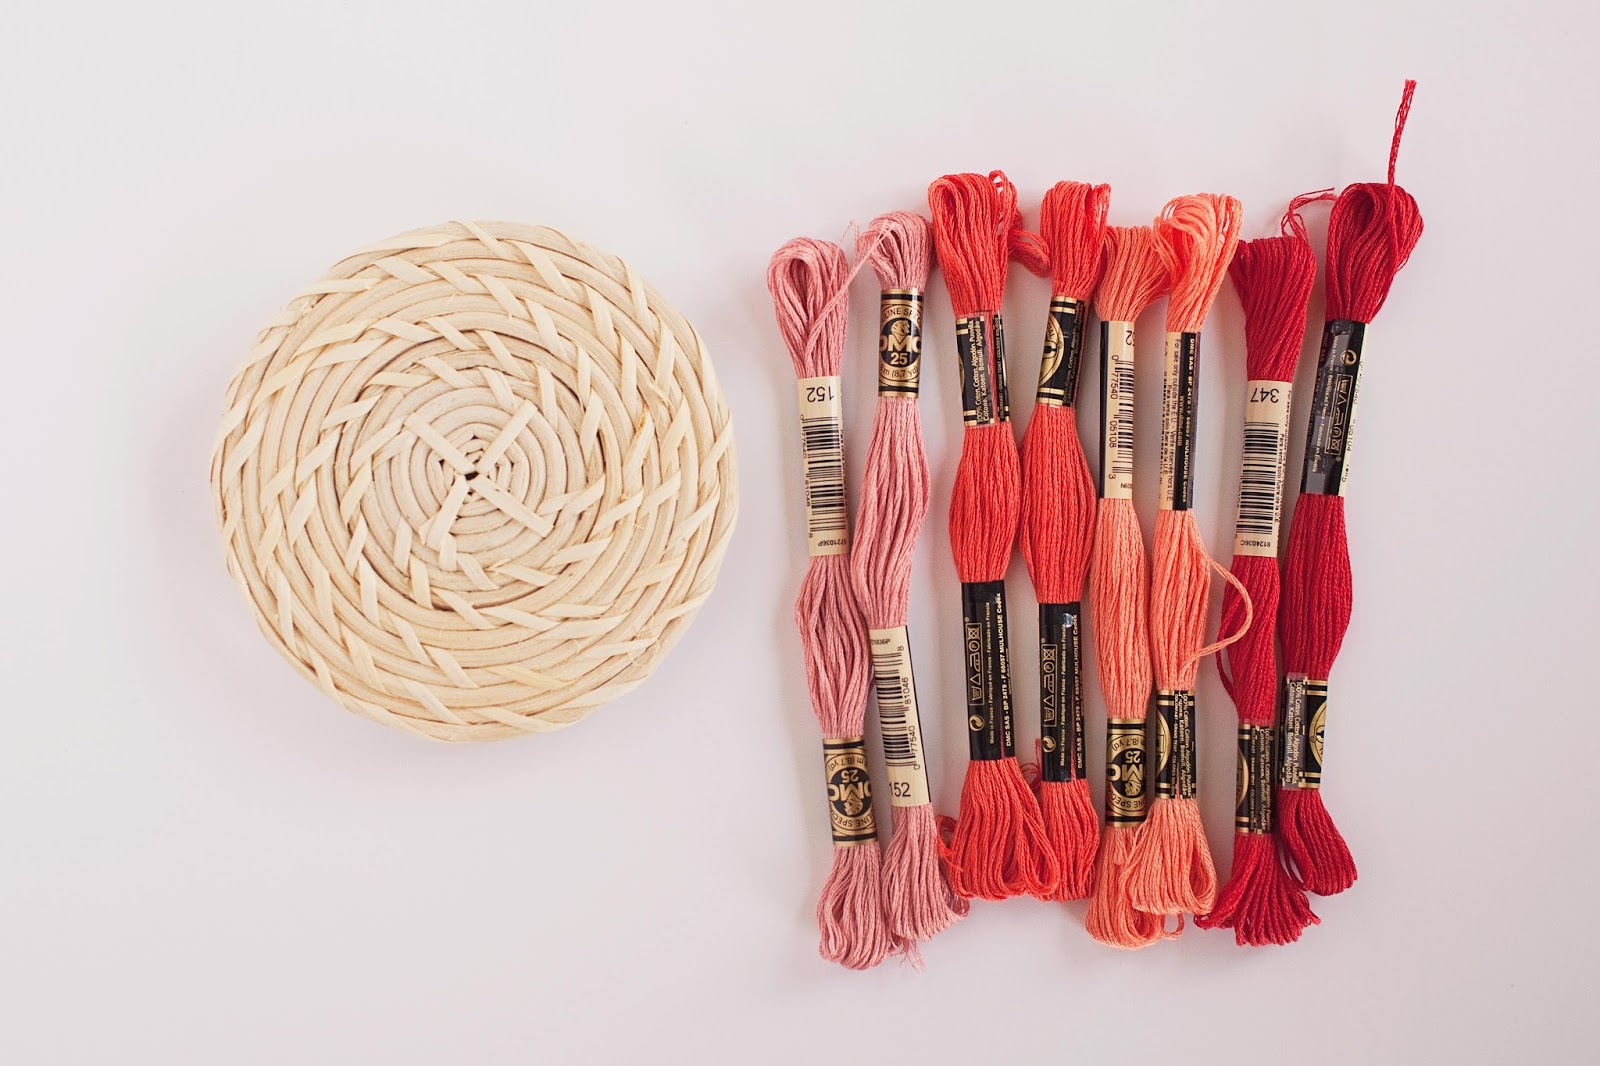
Supplies:
-Baskets (I got these baskets from IKEA)
-Embroidery thread
Tips to the amount of thread:
For the largest basket I used 2 of each color
Medium basket 1 1/2 of each color
Small basket 1 of each color
Take the tops off of your baskets.
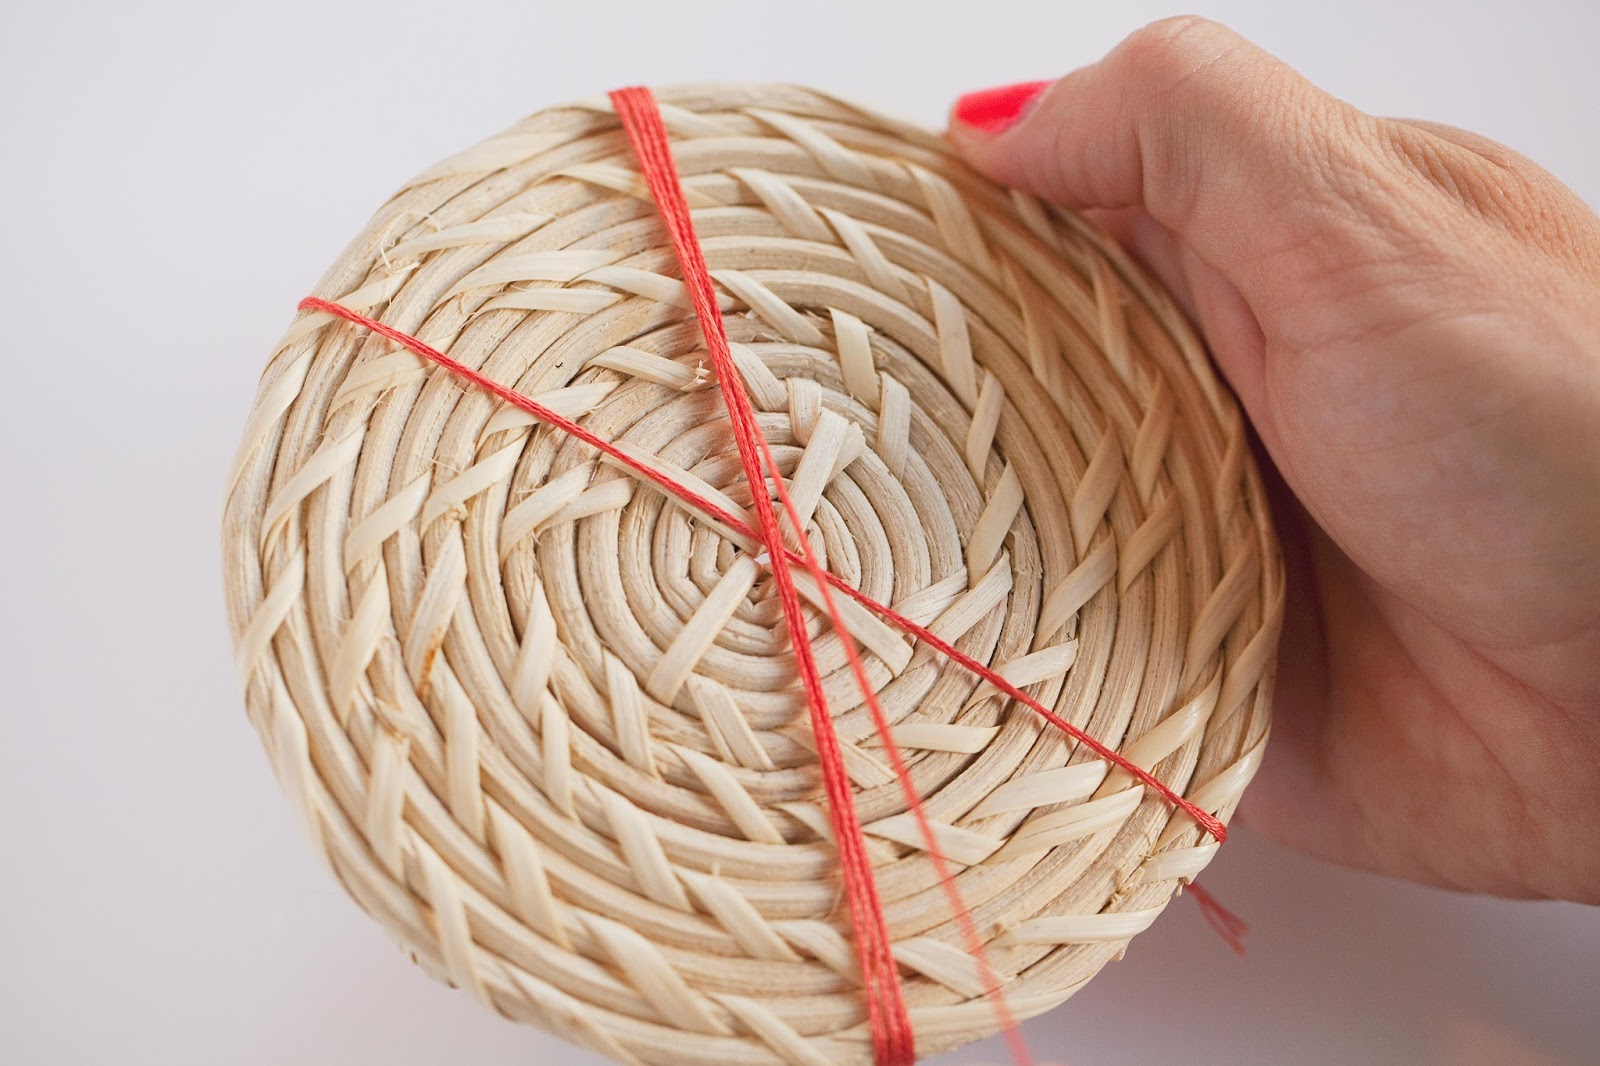
To start the first wrap, pick one color and place the thread across the very center of the basket top.
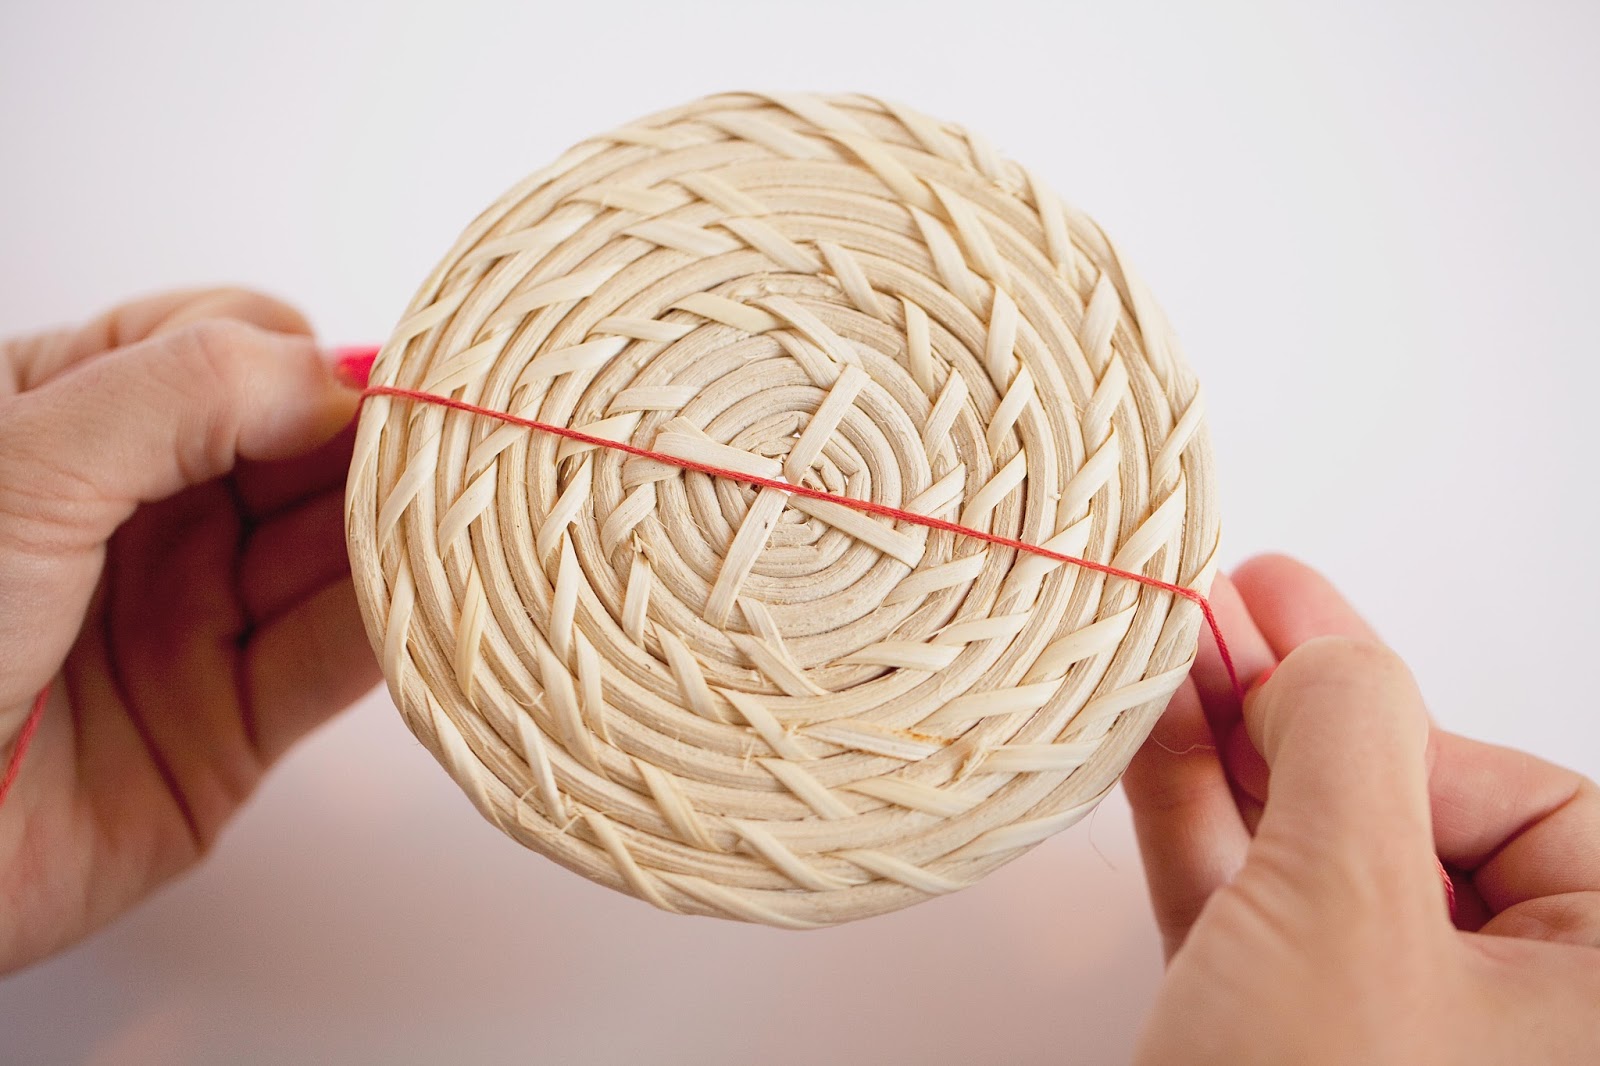
Then tie a knot on the bottom side to secure the thread.

Next, map out where you are going to wrap. Make an “X”

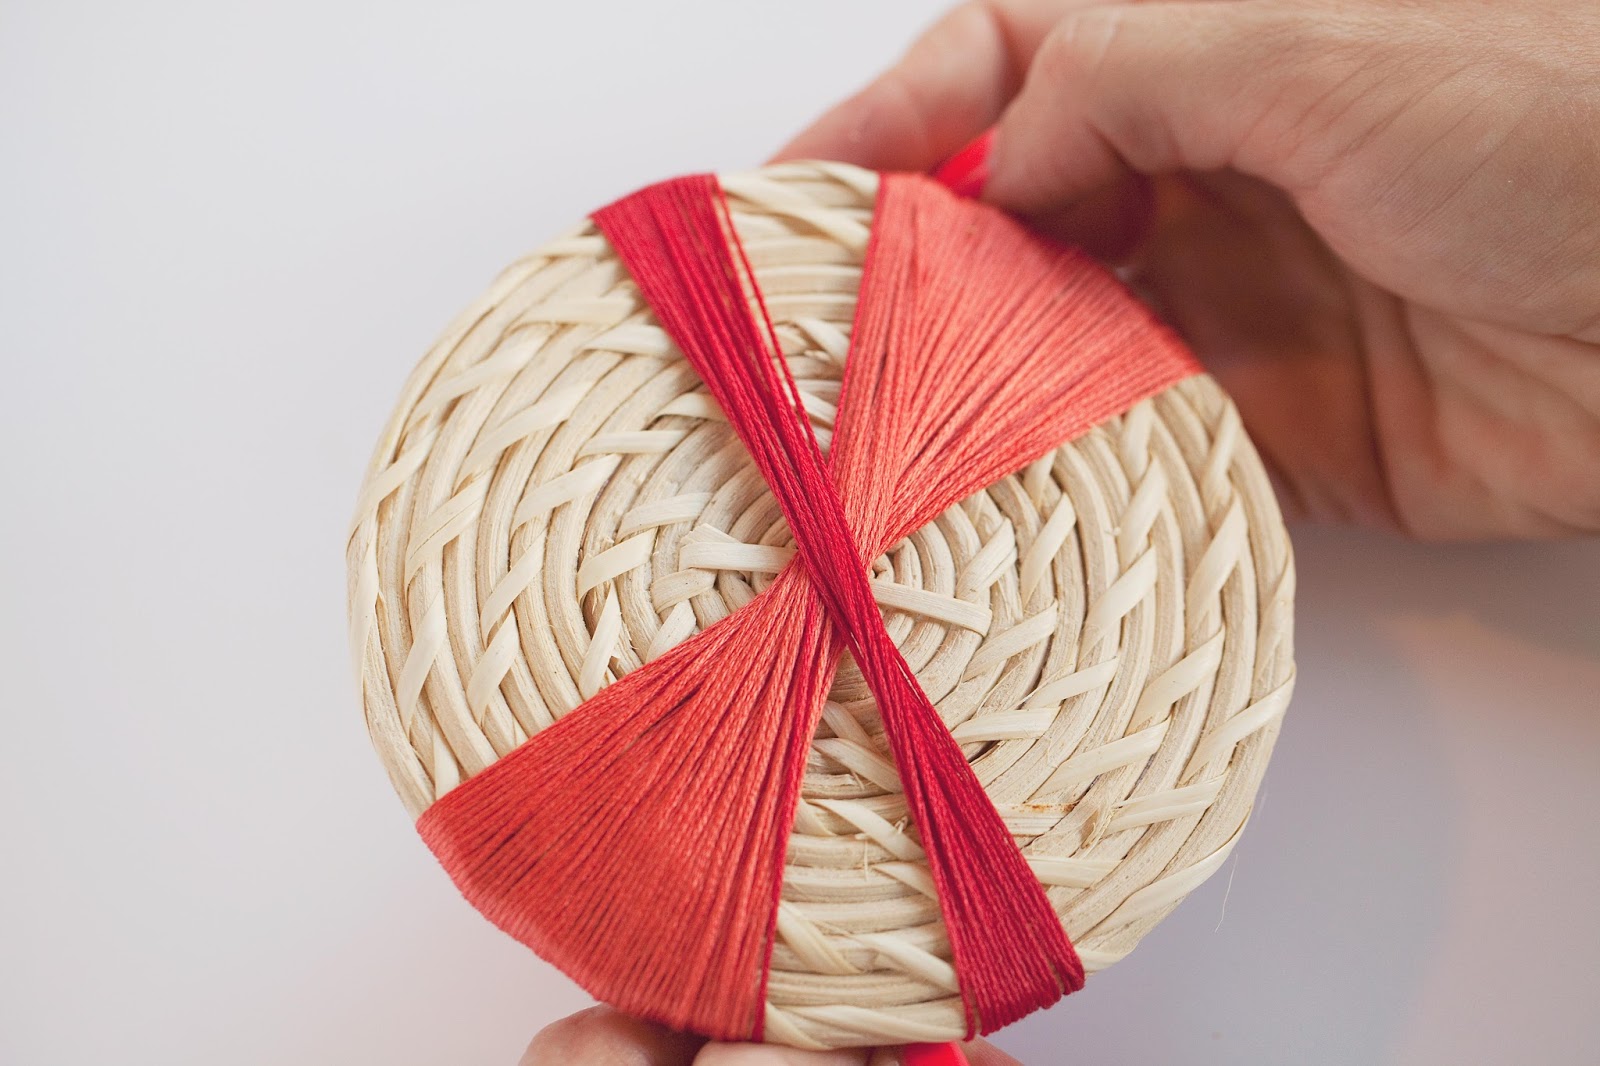
Then start to wrap one side, lining up the thread.


As you continue wrapping from one side to the opposite side of the “X”, you will start to get a little bit of a twist.

When you are done, wrap the thread around the middle of the “X” on the back of the top.

Tie it off and then cut off excess.

Add another color.

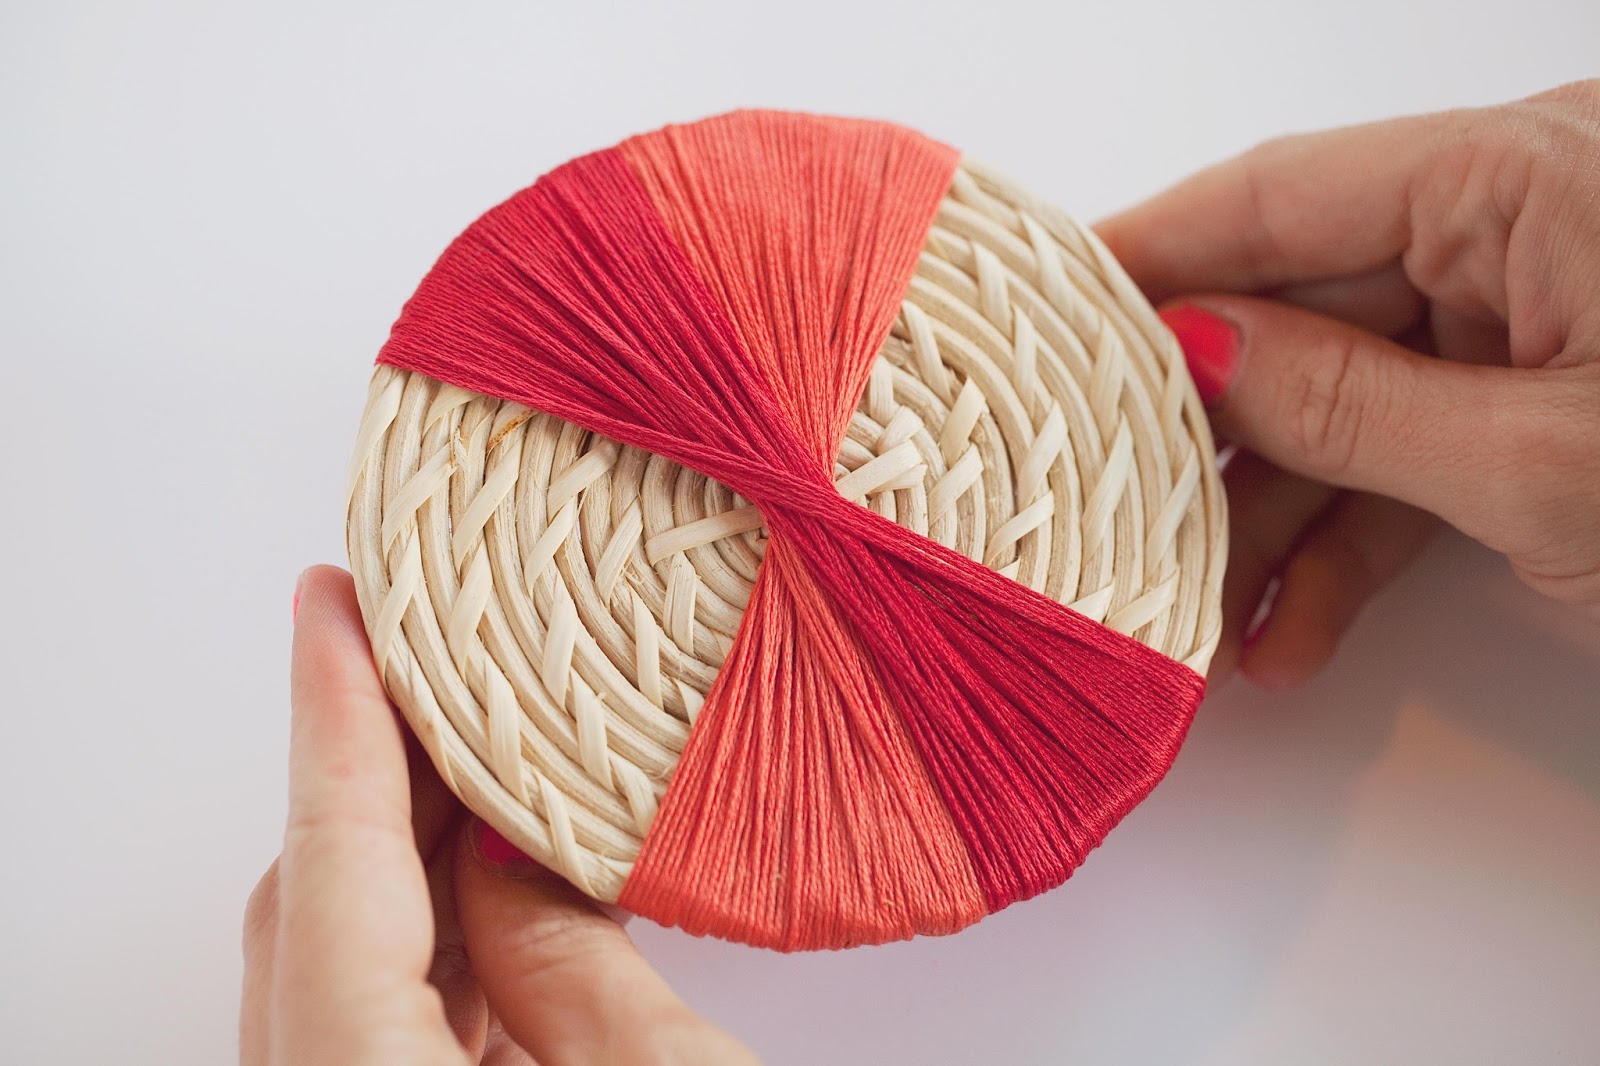

And continue until the top of the basket is all wrapped!