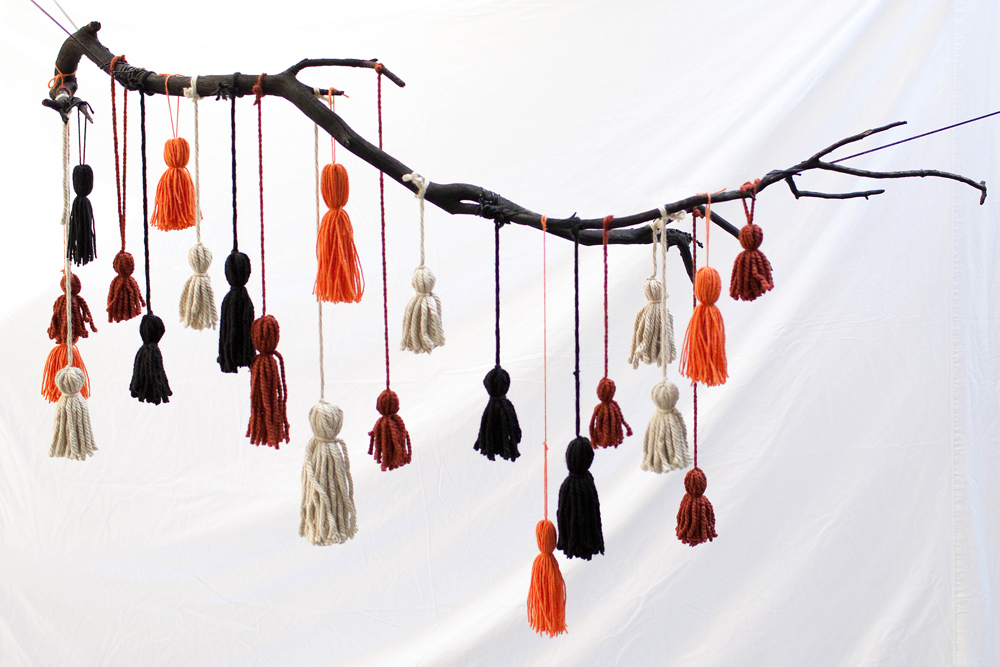


I am on the tassel bandwagon. Have been since it took off. So naturally when a Halloween party was in the works with Merrick, my first thought was “where can I incorporate some tassels?” ha ha. And then the tassel chandelier was born.
Today we have teamed up with Jo-ann Fabric and Craft to share this simple and amazing project. We were semi obsessed with how it turned out.
Can’t wait to share the rest of the PAR-TAY this week!
My favorite thing about this project is that it’s customizable — try different sizes of branches, different color yarn, or numbers of tassels to make your chandelier completely unique. Also, they’re a gorgeous fixture for above your table, like we did for our party. But you could also mount it above your fireplace, on your door in place of a wreath, or on your wall…sooooo many possibilities!
Read the tutorial after the jump!
Materials:
Large dead branch
Spray Paint
Yarn in different colors and sizes
Cardboard
Scissors

Jo-Ann’s always has the best coupons, so make sure you sign up to be a preferred member so you’re always receiving their best deals!
Step 1. Find a large dead branch. Dead branches will be much lighter in weight than live branches, so try to find a branch on the ground, rather than still on the tree. Spray paint it black and let it completely dry.

Step 2. Time to make the tassels. Cut a rectangle piece of cardboard about 6″x9″.

Step 3. Take your yarn and begin wrapping it around your cardboard, as shown.

Continue wrapping around until you reach your desired tassel thickness. [tip: if you want uniform tassels, count how many wraps you do and repeat that many wraps for each tassel]. Thin yarn like this requires a lot of wraps for a nice full tassel, but thick yarn (like this one) requires many less wraps.

Once you reach your desired tassel thickness, cut the yarn at the end of the cardboard.

Step 4. Take a new piece of yarn and tuck it through the wrapped yarn, pulling it to the very top, and then tie it in a knot, as shown. You’ll use this long string as the hanger.

Step 5. Now cut through all the layers of yarn at the bottom of the tassel. [tip: it’s easier to tie the top super tight after you’ve cut through the bottom]
Your tassel should now look like this:


Step 6. Now take one more piece of yarn and tie the top of the tassel into a ball. Tuck the strings of the tie in so it blends with the rest of the tassel.

Step 7. Trim the tassel so the bottom is even. Repeat steps 2-7 and make as many tassels as you’d like. Use the 9″ side of the cardboard for longer tassels, or cut another size of cardboard for a variety of sizes.
Step 8. Use fish wire or string to hang your branch up, and then carefully string your tassels on until you reach your desired fullness, and you’re done!
This post was created in partnership with Jo-Ann Fabric and Craft Stores