

Summer time is here and there are so many things I am looking forward to, including warm summer evenings eating outside.
I joined up with 9 other bloggers to share some fun ideas to help you throw the perfect outdoor summer BBQ.
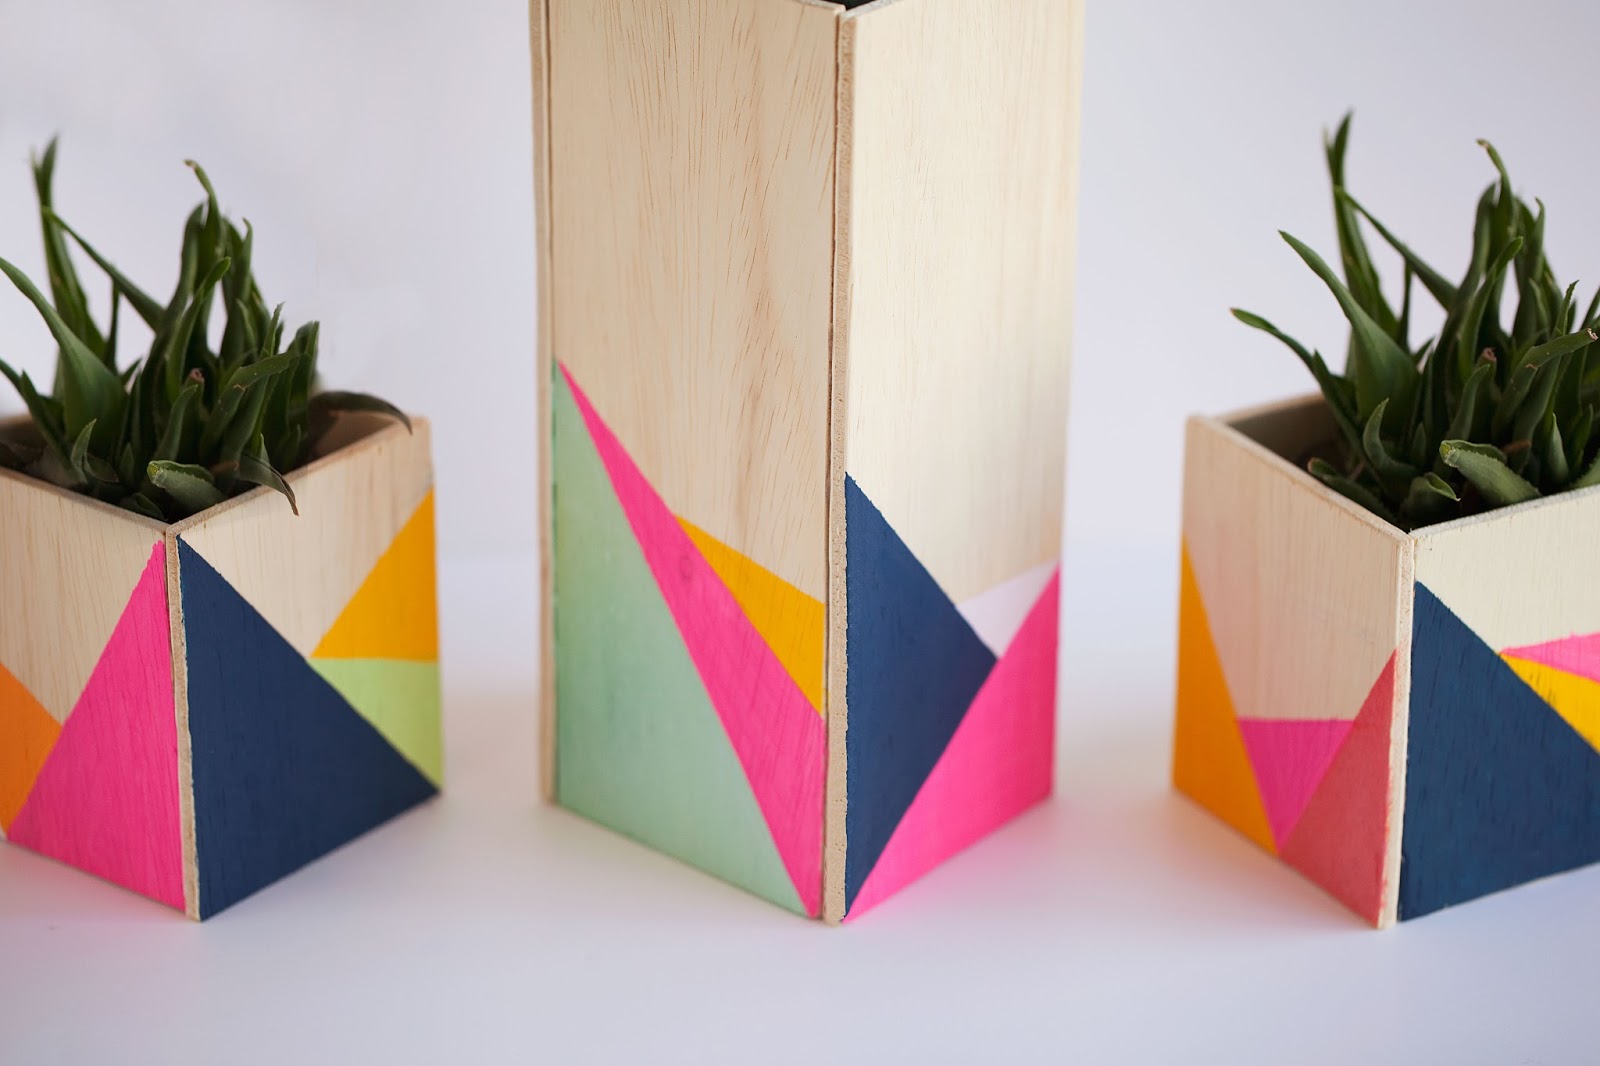
Im sharing these DIY wooden centerpiece boxes. They are such a fun and versatile decoration for any outdoor party. They can hold fresh flowers, succulents, or even a candle, and take no time to make at all!

You can read all about the tutorial after the jump
Now be sure to check out all these delicious and fun ideas for your summer BBQs.
I can’t wait to try some!

I can’t wait to try some!
9. Club Narwhal 10. For My Love Of
Supplies:
Wood- you are going to want to buy a thin wood. Mine is a Sande Plywood from home depot. measurements are 5/32″ 23.75″x47.75″
Acrylic Paint-I used the same color palette as a I used with these. Except I added an orange and instead of black used navy blue
Glue gun
glasses, jars, vases etc.
I bought some glasses from the dollar store, but you can use whatever kind of holder you can find.
Measure it out so you know how to cut the wood. I added a half inch to the height and the length.


cut out four pieces and sand them

add glue…

attach one side

hold together till it dries

When you have glued all sides together it’s time to paint. Take some painters tape (ha ha mine was huge but it did the job) and section off a triangle

paint


section off another triangle and paint again.

continue around all four sides and you’re done


I LOVE these!!! I am going to try to make some version of them for Thanksgiving!
Thanks!! Oh yay, if you get a chance send me pictures I would love to see! xo
Hello there! Wonderful post. Just stopping by to let you know I featured your wonderful DIY on my blog today.
http://www.onecraftymiss.com/current-love-painted-planter-diys/
Awe thanks for the feature!! xoxox